Showing posts with label Caring for clothes. Show all posts

Thursday, 8 November 2018

Caring for your winter coats

Our coats have a tough life. Out in all weathers, protecting us from the elements for six months of the year, then all but abandoned for the spring and summer until temperatures start to fall again. Coats are often one of our more expensive clothing purchases, and we want them to last for as long as possible, but we wear them every day during cold weather, so they are subject to more wear and tear than a lot of our clothes. If you’re worried that your favourite coat looks a little drab, here’s my guide to caring for your winter outerwear. 


Follow the care instructions...
Winter coats are designed to protect us from the elements, but sometimes they need protecting from the elements themselves. Leather shoes need polishing and waterproofing to keep the leather supple and our feet dry, and some winter coats need the same treatment. Barbour wax jackets are designed to last for years (they can be sent back to the factory for repairs) but they do need re-waxing to keep them waterproof. If you’re organised enough to remember in August, you can send your coat back to be re-waxed professionally, or you can buy a jar of their garment wax and do it yourself. It’s not a particularly messy process but it does take time; spending over an hour of gently massaging softened wax into garment seams sounds a bit odd but it’s well worth the time; my coat is fully weather-proof again.


...but don’t expect miracles from dry cleaning
If your coat is marked or stained, dry cleaning can work wonders. It isn’t always the best at removing odours though, and synthetic lining fabrics can retain odours too, meaning that your coat might not smell so fresh after a couple of warm journeys on public transport. You can clean a coat lining more effectively yourself, using a damp sponge on the lining. 


Try a cool wash
A lot of synthetic or cotton coats are designed to be machine-washed at a cool temperature. My green jacket was starting to show signs of wear; a 30 minute, 30 degree wash meant it lost none of its characterful wear patterns but is now a lot cleaner! If you can, put a synthetic coat inside a guppy bag, or in the wash with a Cora ball, to connect microfibres that could contribute to plastic pollution in our water supply.


Store your clothes sensibly
While few, if any, of us will have a perfect clothes storage system in our homes, we can keep our coats looking better for longer by hanging them on hangers, especially when we’re not wearing them every day. Hanging your coat directly on a hook, especially if it doesn’t have a hanging loop, can leave weird lumps and bumps in the neckline or shoulders of your coat, as the weight of the garment causes the fabric to distort around the hook. Using a hanger and fastening your coats up when you’re not wearing them means they will take up less space on a wall-mounted coat rack or row of hooks.


Mend before you wear?
I have a secret to share. The bound edge of the pocket in this coat came loose years ago and I never mended it, I just fastened it with some safety pins and tried to remember not to put small things in there. I’ve kind of got used to this temporary fix (even though it would take me less than five minutes to sew it back together) so I wanted to share this “confession” as a sort of permission for anyone who worries that their mending or sewing might not be up to scratch,  or that their clothes have to be pristine or they can’t be worn. Let’s face it, there are parts of all of us that are just held together with safety pins, but somehow we’re making it work every day. 


This brings me to the thing I wanted to share along with the tips: my thoughts on the value judgements we place on the way things look. I’m wearing my old, much-loved coats proudly because I don’t think there is anything bad about wearing clothes that look worn (we pay extra for someone to sandpaper our jeans, for goodness sake!), and that it’s not always necessary or practical for something to look pristine. Most of us have things we need to prioritise over tending to our clothes, but at the same time garment care is a useful skill that can save us money in the long run. If it helps, reframe this as a subversive and radical act instead of another chore you ought to be doing. Fast fashion relies on customer dissatisfaction with clothes that age or wear badly, so you can stop the cycle of consumption by loving your imperfect but oh-so-wearable clothes.


Thursday, 5 July 2018

Packing a plastic-free holiday wardrobe

Plastics now form a key part of our summer holiday wardrobes, from swimwear to sunglasses. Fabrics made from plastic, like polyester and nylon, dry quickly and don’t crease, and pleather is becoming a go-to alternative for vegan shoes and bags.


Plastic Free July is mainly aimed at cutting out single-use plastics, but if you’re looking to have less plastic in your life generally, get creative with clothes and accessories made from an amazing range of materials. And if you can’t avoid plastics, make sure they are recycled, or reusable.

Here’s my guide to top-to-toe natural fibres.


Paper
Nothing says summer style like a beautiful wide-brimmed straw hat, but if you’re after something a little easier to pack, this visor is 100% paper and rolls up to take up minimal space. It’s also surprisingly durable: I’ve had it for years, despite the fact that it was a high-street impulse-buy by a former colleague who passed it on to me!


Silk
It feels like the perfect summer fabric to me. It’s not without its problems: it’s not cruelty-free as the moth larvae in the silk cocoons are killed (unless you buy peace silk, where the moths emerge from the cocoons before the cocoons are harvested). I’m wrestling with my conscience on this one, but I’m still wearing vintage silk clothes. Charity shops are excellent sources of secondhand clothes made from luxury fabrics at this time of year; someone else’s fear of outfit repeating could be your bargain buy!


Lycocel/Tencel/Modal
A cruelty-free, vegan alternative to silk, that is less damaging to process than viscose? Yes please! Lycocel is the generic name for fabric made from wood, and different brands have been experimenting with a range of ways to use this versatile material. The Sustainable Angle showed Tencel trainers at their Future Fabrics Expo, with every part of the shoe made from wood fibre. It can also be woven into soft drapey fabrics that rival silk, and knitted into a soft jersey that makes brilliant breathable undies.


Bamboo
I’ve raved about the excellent properties of bamboo leggings, socks and knickers in past posts. Bamboo fabric is moisture-wicking so it makes the perfect alternative to synthetic sportswear in this hot weather.


Plant Leather
My Pinatex Po-Zu shoes are perfect in summer weather; the coconut fibre and natural latex insole means my feet are supported but not sweaty throughout the day. If you're stuck in the city and you need to wear closed toe shoes to work (I don't want dressmaking pins getting stuck in my toes!) these flats are more robust than ballet flats but just as comfortable.


Plastic has become an almost unavoidable fact of life, but you can reduce your environmental impact by choosing plastic-based products that have been thoughtfully made, or by making thoughtful decisions yourself.

Recycled plastic
I bought bikinis from Davy J and Auria last year, but there are plenty of sustainable swimwear brands that are now using reclaimed plastics to make their products, whether you’re looking for activewear or something to pose by the pool in.


I blogged earlier in the year about my w.r.yuma sunglasses, 3D printed from recycled car dashboards! Another sustainable alternative is vintage sunglasses; if you need prescription lenses there are companies out there that will swap original lenses for new ones.


Buy less, choose well
Spending a bit extra on better quality clothes will mean they will see you through several summers, rather than having to go in the bin as soon as the temperature drops. None of us want to spend our holidays doing chores, but it’s worth spending a few moments a day looking after your clothes so you’ll look as fabulous as you feel on a well-deserved break.

  • Put on suncream as soon as you get out of the shower in the morning and let it absorb into your skin, that way you should be able to avoid sunscreen stains on pale clothing. 
  • Rinse swimwear when you get back from the beach or pool and hang it up to dry. 
  • Get a case for your sunglasses and remember to take it with you! Try not to sit on them. 


Do you really *need* a whole new holiday wardrobe? I love a warm weekend when I know it’s finally time to liberate those frivolous dresses from my closet; the ones that are too low-cut, strappy or see-through for work, but are perfect for lounging in the park, or as a poolside cover-up. They remind me of past summertime shenanigans and put me in a holiday mood! Those fun, floaty holiday clothes never really go out of style, so hang on to the ones you had the most fun in, and they’ll be ready for another great summer as soon as the weather is.


Thursday, 7 June 2018

Top to toe alterations: how to hem your clothes

It is a truth universally acknowledged that a short woman in possession of several maxi dresses must be in need of a good hemming tutorial!


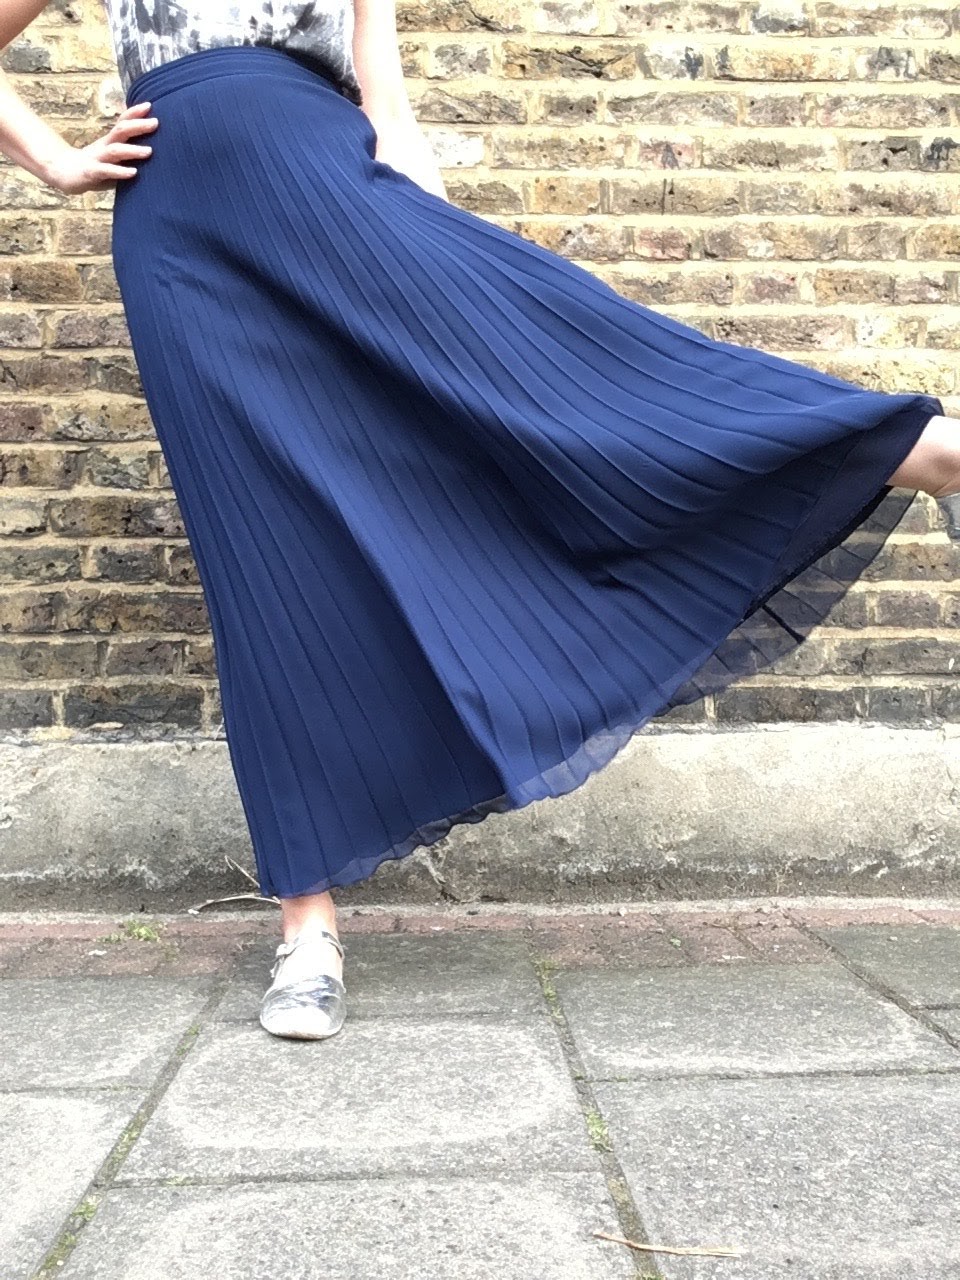
One of the reasons our clothes might not get worn very often is poor fit, and this can apply vertically as well as horizontally on the body. I’m a little bit shorter than average, and I own several maxi skirts and dresses that are just that little bit too long. I've made the mistake of wearing them thinking they would be fine, and then realised they really wouldn’t be. I’ve tripped on the stairs at work while carrying coffee, nearly got a floaty hem caught in the escalator at a tube station and noticed that the streets of London are much too dirty for nice clothes to trail on the ground!

There are several ways you can alter the hem on your clothes, depending on whether you have a sewing machine, an overlocker or just your hands. I’ve had several hems to alter recently, so here are some examples of various techniques.


A herringbone hem, by hand

The hem on this vintage dress has been finished off with a lace trim, and secured using a blind hemming machine. Unless you work in an industrial sewing facility you are unlikely to have access to a blind hemming machine, but it’s easy enough to replicate a similar stitch by hand.


For this stitch, you sew “backwards” (i.e. towards the hand you sew with). I am left handed, so apologies to right-handed people if this is confusing, but this might be a nice opportunity for my fellow lefties to benefit! To start, secure your thread to the hem allowance, then make a tiny stitch into the fabric just above the hem allowance, with your needle pointing “forwards”. Bring your thread back towards your sewing hand, and make another small stitch in your hem allowance. The thread will form a crisscrossing pattern over the edge of your hem allowance, while the only thing visible on the right side of the garment will be the tiny stitches you have made in the fabric.


The only disadvantage to this stitch is that it can cause the appearance of a ridge or line on the garment if it is made of quite a thick fabric, and some shoes could get snagged on the stitches! To avoid this, you can do the same stitch between your hem allowance and the fabric of the garment, like I have done here with this lovely pair of wide-leg trousers that were much too long! Fold down the top centimetre of the hem allowance towards you, then herringbone in the same way.


A topstitched hem, using a sewing machine

This ripped hem was the result of my trip on the stairs, and the point where I could no longer ignore the fact that this skirt was a bit too long! The skirt had ripped just above where the original hem allowance finished, so I cut this off all the way round the skirt, then replicated the original hem.


I pressed a 1cm hem allowance all the way round the skirt, then folded this up on itself again and pressed the new hem edge, so the raw edge of the hem allowance would be hidden.

I machined the hem from the right side of the skirt (known as “topstitching”) using the measurement gauge on my sewing machine to make sure I was catching the seam allowance on the wrong side.


A babylock hem, using an overlocker

An overlocker (or serger) is a specialist sewing machine that uses three or four threads to finish off a fabric edge, or stitch two edges together. It has a built-in blade that trims away excess fabric as you sew, so it’s not suitable for every job, but is great if you want to work with stretch fabrics or give homemade garments a professional looking finish. As well as seams, overlockers are useful for edges; this fine “babylock” edge can be used on a lot of floaty fabrics.


It’s a surprisingly robust finish; this skirt didn’t tear when I caught it in an escalator, but it did give me enough of a fright to resolve to sort out the hem! When I put it on I could see that the front and back of the skirt had “dropped” - this is quite common on circle skirts where the part of the skirt hanging from the waistband on the bias stretches a bit (or a lot!)


I levelled the hem on my dressmaking stand, then cut off the excess fabric, leaving a few millimetres for the blade on my overlocker to trim off, to get the neatest possible edge. It took a few minutes to change the settings on my overlocker, and then the job was done in no time at all!


I know it’s tempting to reach for the iron-on hemming tape, but I hope this tutorial will encourage at least some of you to pick up a needle and thread instead and give your garments a professional finish.

Thursday, 8 February 2018

Invisible mending for smart clothes: quick fixes to stop a small problem becoming a big project!


It’s probably happened to all of us. We’re happily going about our business, in a seemingly well-fitting piece of clothing. Then we bend down suddenly or hop up to perch on a high chair and hear that telltale krrrrrrrk of ripping fabric, or feel a breath of chilly air on a previously well-covered part of our persons. If our clothes are particularly sneaky, we won’t notice at all until someone points it out to us. If we’re dressed smartly, we’ll probably sidle around with a jumper tied around our middles until we can scurry home to change. What happens to these clothes now? Can they be saved, or do we have to send them to textile recycling?


Casual clothes are easier to repair; a visibly patched pair of jeans will probably look more on-trend than they did when they were brand new, and knitwear or dresses can be embellished with embroidery to disguise holes. Smart clothes can be a different story (especially if there is a dress code to follow), and if clothes have torn in an area you’d rather not draw attention to, your options are either refashioning, or invisible mending. 


This loose-fitting dress apparently wasn’t loose-fitting everywhere, as it split right across my bottom while I was at work! This is a good illustration of why we shouldn’t take fit issues that lead to rips in our clothes too personally; problems with the pattern, manufacture, or faults in the fabric itself are most likely to contribute to a lack of “ease” that allows clothes to move with our bodies. 


Because of the position and size of the tear, I decided to refashion the dress into a top, but I realised I could use the fabric to save a pair of trousers (made by the same brand, from the same fabric) that were destined for a similar fate.


A key part of looking after clothes is actually to look at them; give them a once-over after washing, or while you are putting them away. It’s much easier to reinforce an area that looks a bit threadbare than to repair a big rip or tear. This small ladder in the fabric doesn't look like much of a problem now, but because it’s right on the crotch seam, I wanted to repair it straight away, before it got any worse. 


Using the fabric I cut from the bottom of my tunic dress, I cut a patch to reinforce the trousers from the inside. Using pinking shears means the edges of the patch won’t fray, and I cut the patch on the bias (following a diagonal line across the fabric, rather than the vertical or horizontal lines of the warp and weft threads of a woven fabric) so it will have a bit of “give” in it. If you don’t conveniently have a piece of matching fabric to hand, most fabric shops will sell a 10cm wide piece as a sample, or send you a swatch that is approx 10 by 10cm for around £1.


I pinned the patch on the inside of the trousers, then turned them the right way out to stitch the patch down. This doesn’t require a special technique, just a running stitch around the hole or ladder (I usually do several rows or concentric circles to make sure the patch is secure). I also stitched the loose threads in the ladder down to the patch to stop them from catching on anything or pulling further.


I was in a mending mood, so I also darned the underarm of a black roll-neck sweater (underarms are another area where I prefer an invisible mend). Mending yarns for fine, shop-bought machine knits are available from haberdashery shops in a range of colours. There is a great darning tutorial in the Fashion Revolution zine Loved Clothes Last; it works for visible or invisible darning, just choose the colour of your yarn!


Looking at the photos I’d taken of the tunic dress to show the rip, I realised the style was actually quite unflattering on me. I unpicked the gathered elastic band, and cut a triangular underbust panel from the piece I’d cut from the bottom, to give the top more of a vintage look. I also cut two strips which I made into waist ties so I can cinch the waist in a bit.


I topstitched the new panel onto the dress, catching the waist ties on at the side seams, then folded the top of the pocket panel down and stitched it in place. I finished the top by hemming it; I only used a small hem allowance because I wanted to keep as much length in the top as possible, and I did have to shorten the pocket bags slightly so they wouldn’t hang out from under the hem, but I’ve managed to turn something that was unwearable in its broken state into something I’ll want to wear again.


Hopefully my newly-mended sweater and trousers will remain intact for the foreseeable future: they had both been out of circulation for quite a while because they needed mending and now I just wish I hadn’t put it off for so long; these mends are quick and hassle-free! There’s no sewing machine required, and I was able to work with one eye on the TV.


If you have clothes that aren’t quite up to scratch, why not put aside a couple of minutes this weekend to do a quick repair, and reunite yourself with a favourite piece of clothing.


Thursday, 7 September 2017

Autumn approaches: how to prepare your wardrobe for the changing seasons

I love the crisp cold of a sunny autumn morning, the red-gold of the leaves before they fall from the trees, but I don't love not really knowing what to wear, or being informed that the best time to buy a winter coat was in August, when I was sweltering on the tube in a cotton frock. Most of us dress for the season we're in, regardless of when the high street would like us to buy certain clothes, but with a bit of preparation we can make the most of our wardrobes no matter what sort of weather might mark the changing of the seasons. 


Care for your favourite winter coat instead of buying a new one: Unless you are incredibly organised, your winter coat is probably where you left it on the first warm morning of spring. If it doesn't look its best, there are plenty of ways to spruce it up without having to go to the expense of buying a new one, or even having to make a trip to the dry cleaners. 
If you wore it into spring and got hot and sweaty (let's face it, sometimes it's impossible to struggle out of a coat on a packed rush-hour train), try gently sponging the underarms of the lining with a damp (not wet!) cloth, then leaving it to dry inside out. This is a much more effective method of freshening up the lining than dry cleaning, which can 'set' the smell of sweat. 
Baby wipes can work wonders on traces of make-up left on a high collar (test on an inconspicuous part of the coat first if it's a pale colour), and a good brush with a clothes brush, or a steam (with a garment steamer if you can get your hands on one, a steam iron if you can't), can lift and revive the flattened pile on a wool coat. 


If you have a wax jacket, wax it now! Regular waxing will prolong the life of your coat and keep it waterproof, and you can also use the wax on shoes to make them more water-resistant. 

Dressing for commuting on the London Underground at this time of year is particularly frustrating; it's chilly when you leave your house first thing in the morning, but the trains still seem to be stuck in a midsummer heatwave, especially at rush hour. I'm saving my winter coats for the colder months when I'll really feel the benefit, and wearing my summer coat with a cosy scarf that's easier to remove and carry when I get too warm.


Even if you’re not a shoe person, show your footwear some love:  As well as waterproofing with wax or polish, keep your favourite boots or winter shoes going by taking them to the cobblers to be re-heeled or re-soled. You will save money in the long run if you invest in good quality shoes and look after them; you'll be helping the environment by not contributing to the amount of fashion industry waste going to landfill, and you will be doing your feet a favour!


Layer up! Now is a good time to check your cosy knitwear; hopefully your sweaters and cardigans haven't fallen prey to moths over the summer! It's not the end of the world if they have; you can darn moth holes, either invisibly (with darning wool which can be bought from haberdashery shops in a range of colours) or visibly, to add a unique feature to your clothes. Keep the moths at bay by washing everything in the drawer, then adding some lavender sachets or cedar cubes when you put your clothes back. I'm hoping that the bugs I've darned onto a moth-damaged cardi will ward off the other creepy-crawlies!


If you're not ready to say goodbye to your favourite summery clothes just yet, keep them going into autumn by layering; with a camisole under a lightweight blouse, a t-shirt under a strappy dress, and tights or leggings under skirts. If you are trying to streamline your wardrobe, think about what garments work well for you over the widest range of seasons and weather conditions; they are the ones you want to base your wardrobe around.


 Don't underestimate wardrobe 'basics': these will vary depending on your personal style, your lifestyle and whether you have to follow certain dress codes for work. I used to buy cheap leggings and jersey tops, but realised this was a false economy; as I often wear these as a 'base layer' for an outfit they will be washed every time I wear them (saving vintage or delicate dresses from needing to be washed too often) so they need to be good quality. I still have a reasonable selection of high-street jersey basics, but since some of my leggings are looking worryingly see-through and a couple of tops are now baggy with twisted seams, I'm going to try to replace them with sustainably or ethically made versions. I can already recommend Thought's bamboo leggings and tights, and I'm planning to try People Tree's jersey basics and Rapanui's very reasonably priced T-shirts!


Checking through your wardrobe now will also help you identify anything that you think you’ll really need as we head into winter, so you’ll be able to plan purchases and spend wisely rather than having to panic-buy something you’re not so keen on.