One of the reasons our clothes might not get worn very often is poor fit, and this can apply vertically as well as horizontally on the body. I’m a little bit shorter than average, and I own several maxi skirts and dresses that are just that little bit too long. I've made the mistake of wearing them thinking they would be fine, and then realised they really wouldn’t be. I’ve tripped on the stairs at work while carrying coffee, nearly got a floaty hem caught in the escalator at a tube station and noticed that the streets of London are much too dirty for nice clothes to trail on the ground!
There are several ways you can alter the hem on your clothes, depending on whether you have a sewing machine, an overlocker or just your hands. I’ve had several hems to alter recently, so here are some examples of various techniques.
A herringbone hem, by hand
The hem on this vintage dress has been finished off with a lace trim, and secured using a blind hemming machine. Unless you work in an industrial sewing facility you are unlikely to have access to a blind hemming machine, but it’s easy enough to replicate a similar stitch by hand.


For this stitch, you sew “backwards” (i.e. towards the hand you sew with). I am left handed, so apologies to right-handed people if this is confusing, but this might be a nice opportunity for my fellow lefties to benefit! To start, secure your thread to the hem allowance, then make a tiny stitch into the fabric just above the hem allowance, with your needle pointing “forwards”. Bring your thread back towards your sewing hand, and make another small stitch in your hem allowance. The thread will form a crisscrossing pattern over the edge of your hem allowance, while the only thing visible on the right side of the garment will be the tiny stitches you have made in the fabric.


The only disadvantage to this stitch is that it can cause the appearance of a ridge or line on the garment if it is made of quite a thick fabric, and some shoes could get snagged on the stitches! To avoid this, you can do the same stitch between your hem allowance and the fabric of the garment, like I have done here with this lovely pair of wide-leg trousers that were much too long! Fold down the top centimetre of the hem allowance towards you, then herringbone in the same way.


A topstitched hem, using a sewing machine
This ripped hem was the result of my trip on the stairs, and the point where I could no longer ignore the fact that this skirt was a bit too long! The skirt had ripped just above where the original hem allowance finished, so I cut this off all the way round the skirt, then replicated the original hem.

I pressed a 1cm hem allowance all the way round the skirt, then folded this up on itself again and pressed the new hem edge, so the raw edge of the hem allowance would be hidden.
I machined the hem from the right side of the skirt (known as “topstitching”) using the measurement gauge on my sewing machine to make sure I was catching the seam allowance on the wrong side.

A babylock hem, using an overlocker
An overlocker (or serger) is a specialist sewing machine that uses three or four threads to finish off a fabric edge, or stitch two edges together. It has a built-in blade that trims away excess fabric as you sew, so it’s not suitable for every job, but is great if you want to work with stretch fabrics or give homemade garments a professional looking finish. As well as seams, overlockers are useful for edges; this fine “babylock” edge can be used on a lot of floaty fabrics.


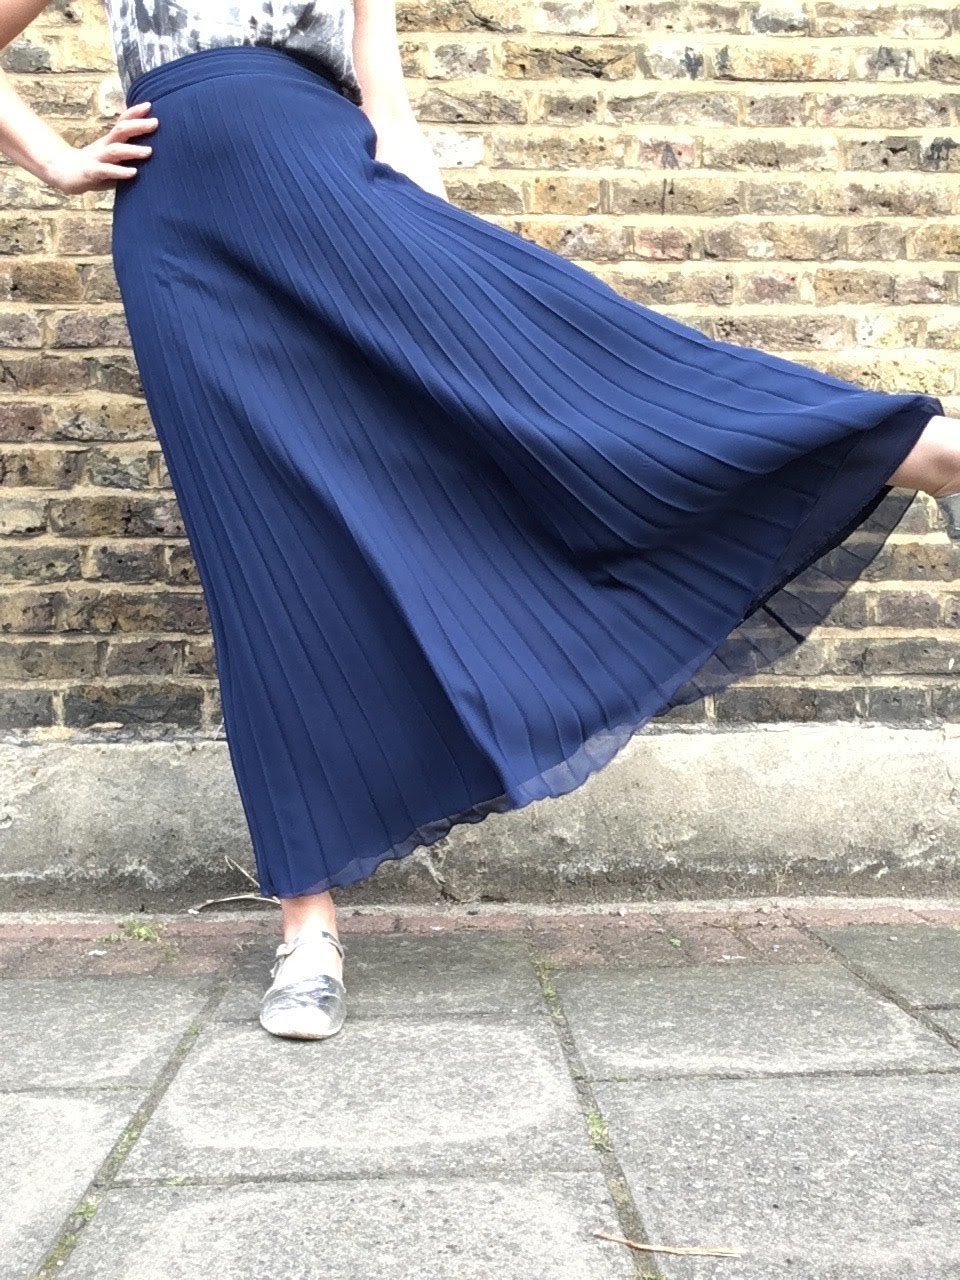
It’s a surprisingly robust finish; this skirt didn’t tear when I caught it in an escalator, but it did give me enough of a fright to resolve to sort out the hem! When I put it on I could see that the front and back of the skirt had “dropped” - this is quite common on circle skirts where the part of the skirt hanging from the waistband on the bias stretches a bit (or a lot!)

I levelled the hem on my dressmaking stand, then cut off the excess fabric, leaving a few millimetres for the blade on my overlocker to trim off, to get the neatest possible edge. It took a few minutes to change the settings on my overlocker, and then the job was done in no time at all!

I know it’s tempting to reach for the iron-on hemming tape, but I hope this tutorial will encourage at least some of you to pick up a needle and thread instead and give your garments a professional finish.
Great collections to check more - avirate Fashion
ReplyDelete